Benchmarking Application
Table of contents
Overview
The Benchmarking application lets you assess the coverage of Essential Climate Variable (ECV) requirements against selected Missions and their instruments. It evaluates whether the parameter values on Missions, Data Products, and Instruments satisfy the parametric constraints defined in ECV Requirements.
Access the Benchmarking
In the topbar, click on the Benchmarking menu item.
Using the Benchmarking Tool
Step 1: Select Missions and/or Instruments
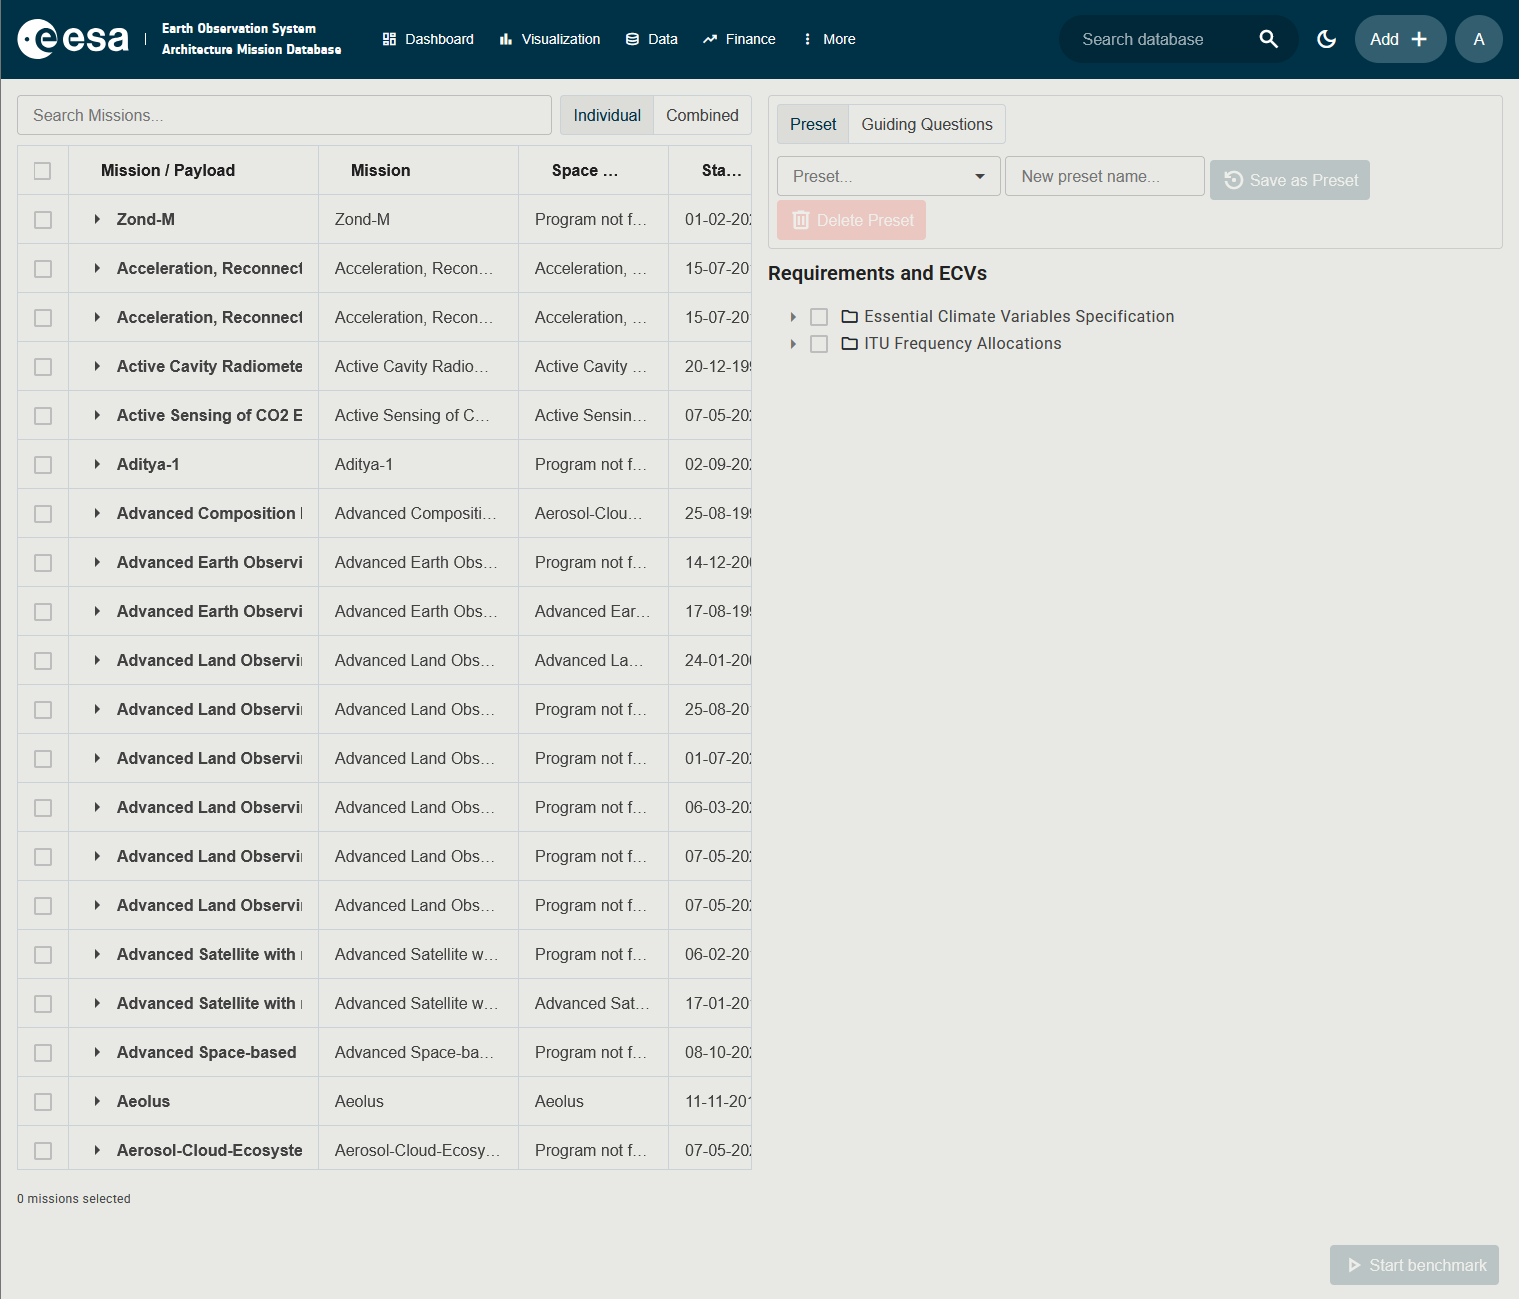
In the left panel, the Mission Selection Component shows a tree of Missions with their Payloads (Instruments) as expandable child rows. Tick the checkboxes next to the Missions and/or individual Payloads you want to benchmark. Ticking a Mission row selects all of its payloads by default, but you can expand the Mission row and refine the selection down to individual instruments.
A Individual / Combined toggle at the top right of the panel controls how results are presented:
| Mode | Meaning |
|---|---|
| Individual | Each selected Mission and Payload is evaluated separately and shown as its own row in the results. |
| Combined | The best coverage result across all selected items is shown per requirement. |
Step 2: Select ECVs and / or Requirement Groups
In the right panel, the ECV and Group Selection Component shows the requirements tree. Tick the ECVs, Requirement Groups or individual ECV Requirements you want to check coverage against.
Step 3: Choose a Source and Save / Reuse a Preset (optional)
The right panel has a source selector at the top with two options:
| Source | Description |
|---|---|
| Preset | Use the ECV and Requirement Group tree to manually select which requirements to evaluate. A Preset control above the tree lets you save the current selection as a named preset and re-apply it later, so you can rerun the same benchmark without re-selecting everything. |
| Guiding Questions | Select one or more Guiding Questions from the searchable multi-select dropdown. Each Guiding Question groups a set of ECV Requirements that will be evaluated in the benchmark run. |
When Preset is selected, the ECV and Requirement Group tree is shown below and the Preset save/load control appears above it. When Guiding Questions is selected, the tree is replaced by the Guiding Questions dropdown.
Step 4: Run the Benchmark
Click Start benchmark at the bottom of the screen. The button is enabled only when at least one Mission/Instrument and one ECV/Requirement are selected.
Step 5: Review Results
The results panel replaces the right pane and shows all combinations of ECV Requirement × Mission (or Instrument). You can:
- Group by dragging column headers (e.g., group by Mission or by ECV category).
- Sort and filter any column.
- Click View in Timelines in the top-right to open the same selection in the Timelines application.
- Click Change Selection to return to the selection panels and refine the inputs.
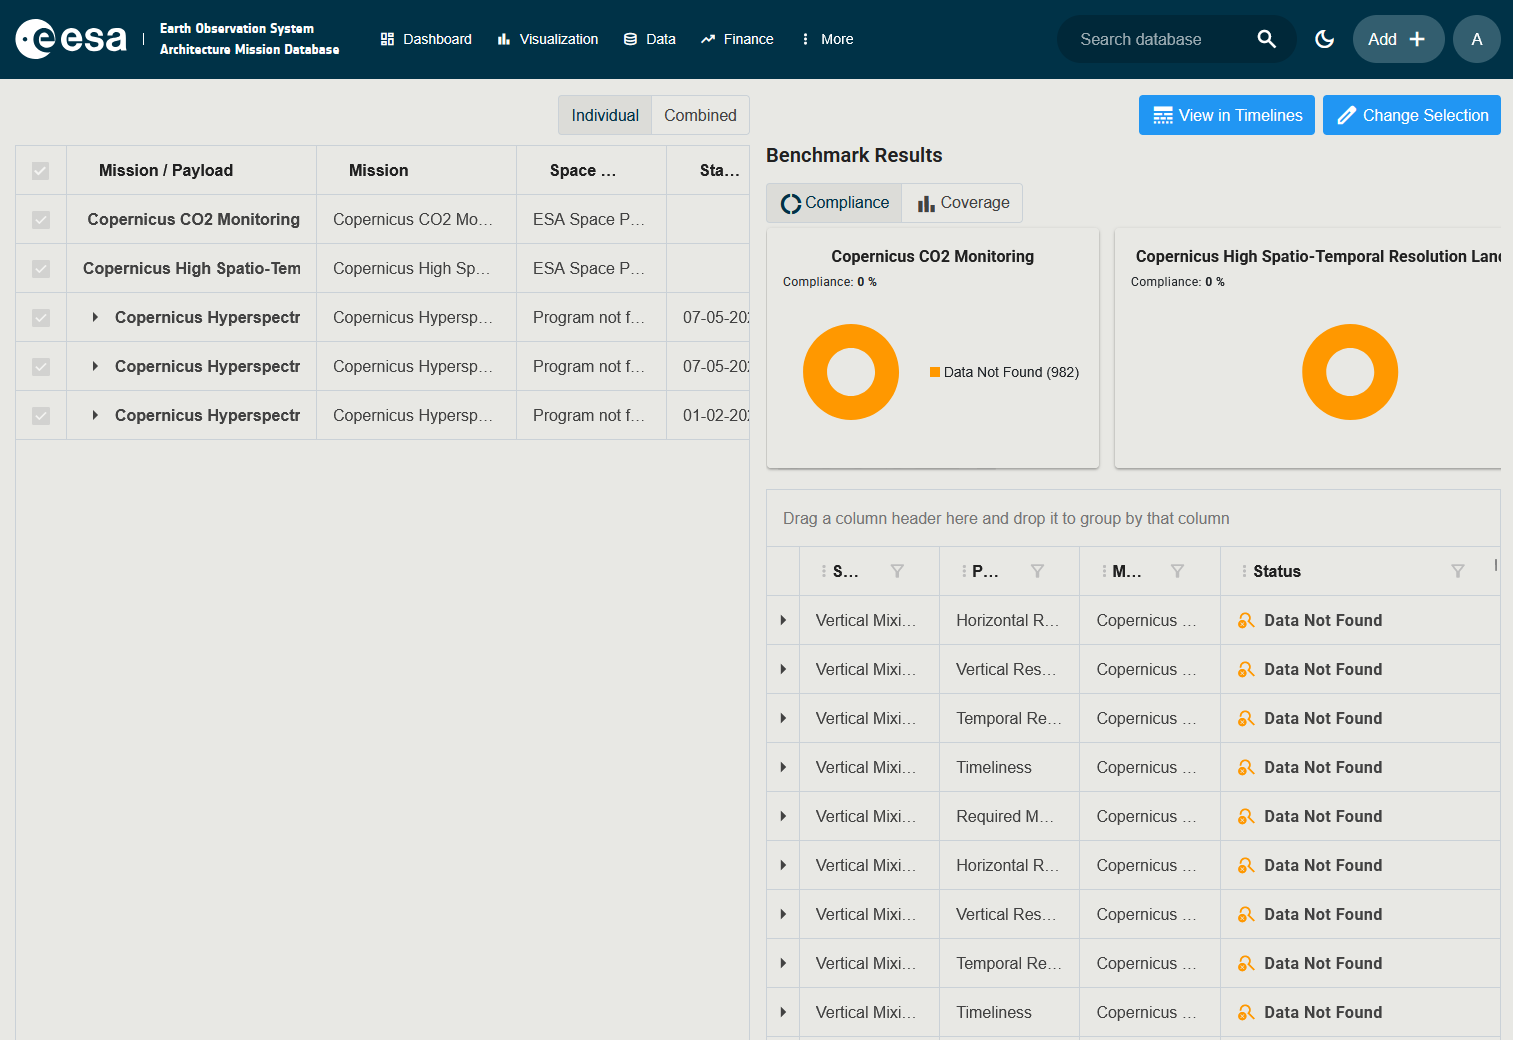
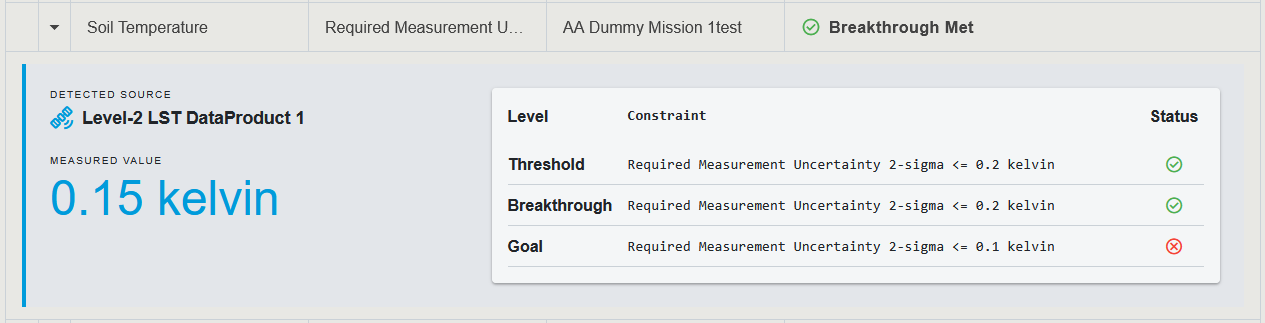
Result Interpretation
There are three possible outcomes for each ECV Requirement:
| Result | Meaning |
|---|---|
| Covered | The requirement is met. The tool indicates which level of the ECV has been fulfilled. |
| Partially covered | Some but not all parametric constraints are satisfied. |
| Not covered | The requirement has not been met, or the required parameter type was not found on the mission’s instruments. |
Combined Mode
In Combined mode the tool evaluates each requirement twice: once against the Mission as a whole and once against each of its instruments. The results table is annotated to indicate the level at which the requirement is satisfied (Mission-level, Instrument-level, or both). This is useful when an ECV requirement may be met by a single instrument even if the Mission’s aggregated parameter values do not satisfy it.
Comparing Two ECV Requirements
From the detail page of an ECV Requirement you can compare it side by side with another ECV Requirement.
- Open the detail page of any ECV Requirement (for example by clicking its name in the Policies and Requirements view).
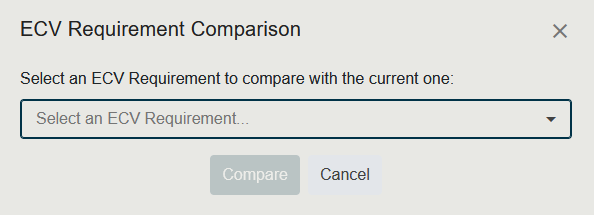
- Click the Compare action. A small dialog opens with the prompt Select an ECV Requirement to compare with the current one.
- Choose the second ECV Requirement from the searchable dropdown. You can type to filter the list.
- Click Compare to open the comparison view, or Cancel to close the dialog without comparing.
The Compare button stays disabled until you have picked a requirement.